Have you ever seen a toy revolver that’s made entirely out of paper? Sounds a bit impossible, right? But today, you and your child can build a super fun multi-barrel paper revolver right at home! It’s easier than you think and it’s a perfect craft project to enjoy some creative bonding time.
This paper revolver doesn’t just look cool; it also works! Kids will love building it piece by piece and watching it “shoot” small paper bullets. Plus, it’s a great way for children to learn patience, focus, and how simple mechanics work. Let’s get started!
📝 Materials You’ll Need:
- A4 or scrap paper (6–8 sheets)
- Thin cardboard strips
- Scissors
- Tape or glue
- Small rubber bands
- Sticky notes (for the trigger)
- A pencil
🛠️ Step-by-Step Instructions
(Watch the full instructions in the video here)
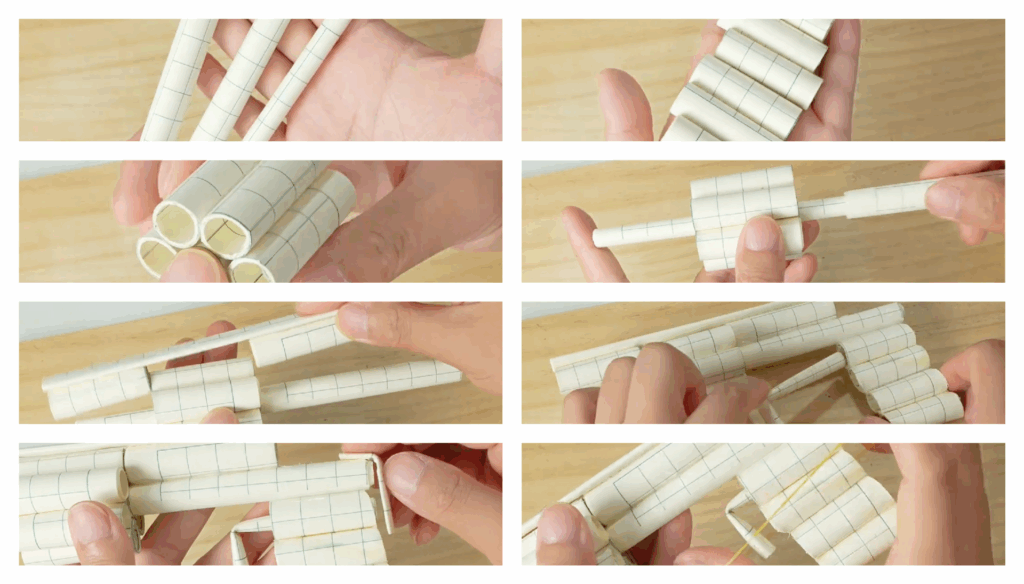
Step 1: Rolling Paper Sticks
You’ll need to roll three types of sticks: thick, medium, and thin. Use a pencil to help roll them tightly.
- Make 6 thick sticks for the outer barrel.
- One medium stick will go in the center.
- The thin stick will be for the launcher mechanism.
Step 2: Build the Barrel Cluster
Glue the 6 thick sticks evenly around the medium stick. Slide a thin stick through from the side—this will let the barrel rotate so you can reload later. It’s like building a mini version of a real revolver barrel!
Step 3: Assemble the Gun Body
Take a strip of cardboard and glue thick sticks to both sides. Attach this to the center tube you just made. This becomes the body of your paper revolver.
Step 4: Create the Handle
Bend a short thick tube to form the handle shape and insert it into the back hole. Reinforce it by gluing a small piece of bent cardboard behind the gun for extra strength.
Step 5: Add the Trigger Mechanism
Stick a small piece of sticky note onto the handle—it will act as a trigger pad. Loop a rubber band over the trigger so it can bounce back when pressed. You’ve now got a working paper trigger!
Step 6: Build the Launcher
Cut a notch at one end of a thin paper strip. Add a small rubber band and secure it with tape. Attach this launcher strip to the gun. It locks into place at the front. Pull it back, press the trigger, and watch it fire!
Step 7: Finishing Touches
Wrap the handle with extra paper to make it more comfortable to hold. Glue a medium stick in front to guide your bullets. To reload, use a thin stick to align the bullet tube, or simply rotate the barrel to load the next shot.
🎨 Decorate and Play!
Encourage your kids to decorate their paper revolver with stickers, colors, or fun superhero names. You can even make a “Paper Blaster 3000” label together.
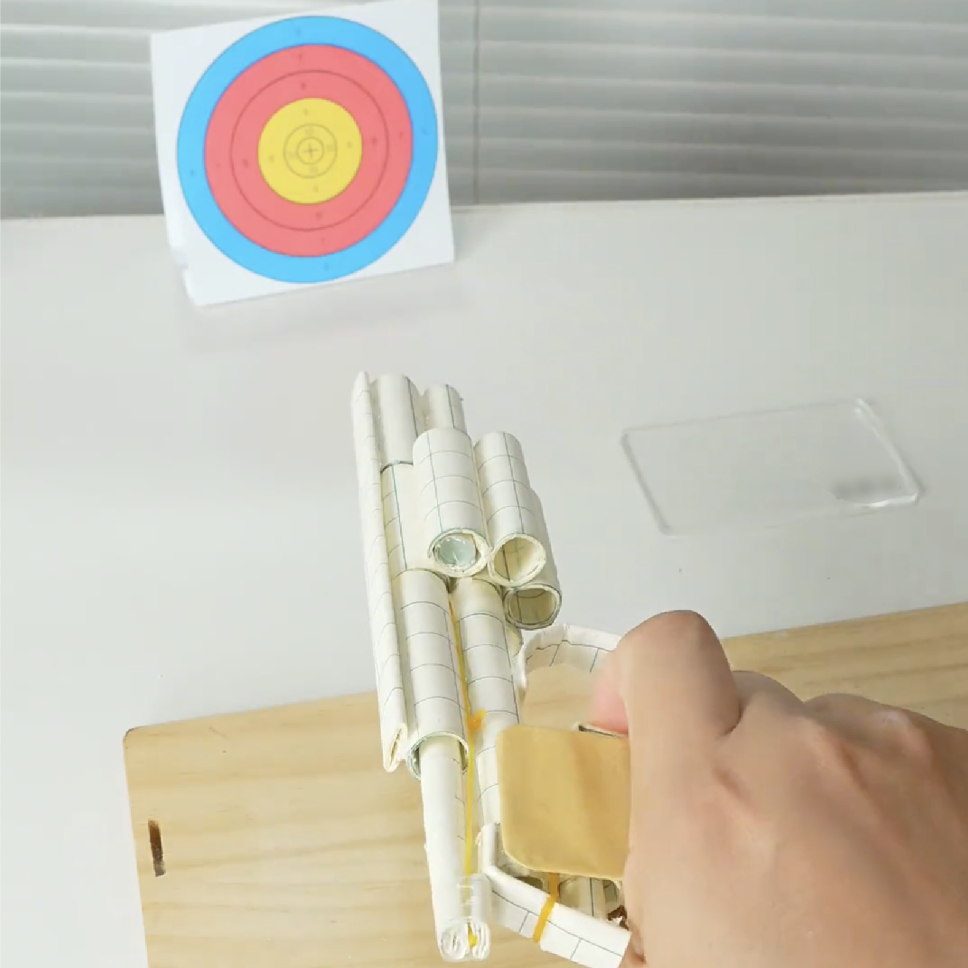
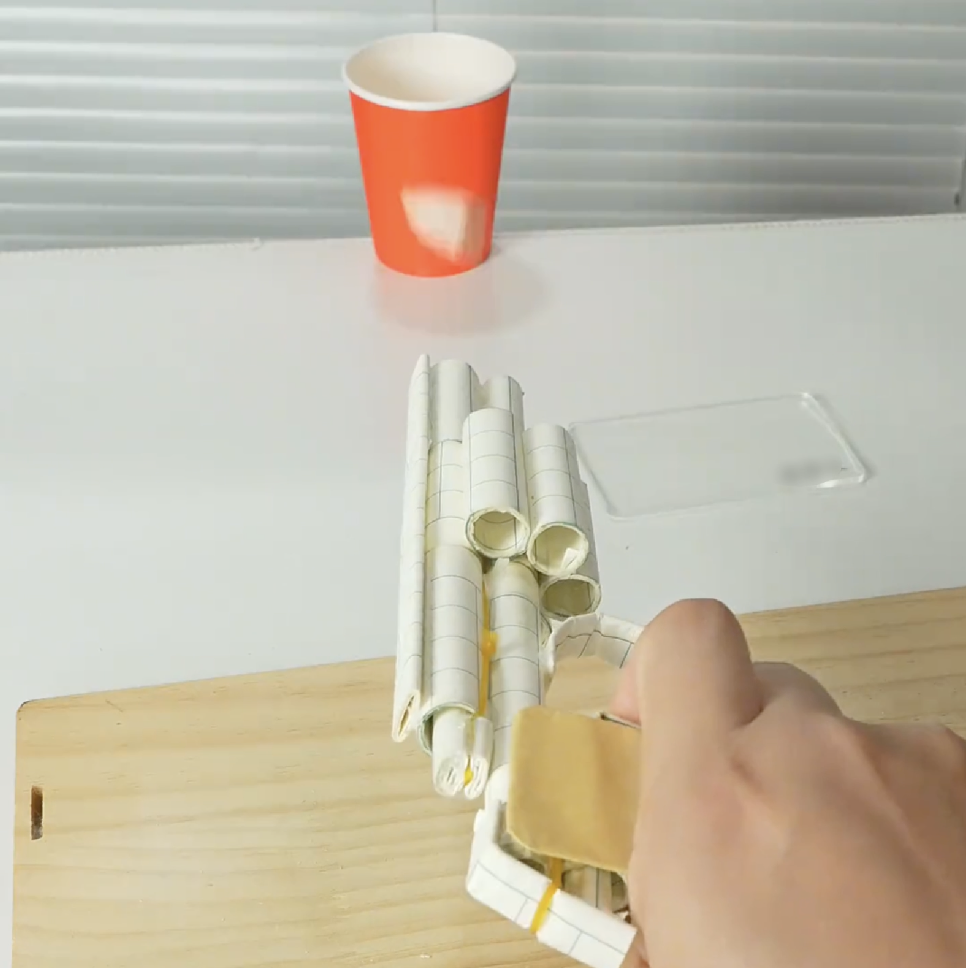
Remember to aim at safe targets like paper cups or boxes, and always supervise younger children while playing.
🎥 Watch the Full Tutorial!
Want to see how every step looks? Watch the full video tutorial here and craft along with us. It’s a fun, screen-free activity that’s perfect for family time.
If you make this paper revolver at home, don’t forget to tag us with your amazing creations. Let’s build, play, and make memories together!